
Resume
The Perfect Resume Header: Format, Examples, & What to Avoid
Learn how to write a resume header that works for recruiters and ATS. Includes formatting, examples, headlines, and common mistakes to avoid.

Published on
April 11, 2023
Updated on
March 5, 2026
A resume header is the top section of your resume that includes your full name, phone, professional email, city and state or country, and a LinkedIn or relevant portfolio. Format it in one line or stacked, left-aligned or centered, with your name in 20–24 pt and the rest 9–12 pt, and single or 1.15 spacing. Leave out your full address, date of birth, photo, multiple phone numbers, and unprofessional links.
Most job seekers don’t spend much time thinking about their resume header.
It’s just your name and contact details, right? But it’s still surprisingly easy to mess up.
Your resume header should be at the very top of the page, but not inside Word’s actual header. You shouldn’t include your full mailing address. Your email needs to look professional. And your LinkedIn profile belongs there too.
In this guide, you’ll learn:
- What to include and leave out of your resume header.
- How to format it so ATS can scan it properly.
Put your resume together stress-free with our AI Resume Builder.
You might also find these helpful:
- How to Make a CV Header & Other Sections
- Top Resume Mistakes to Avoid
- Action Verbs for Your Resume
- All 25+ Resume Sections You Could Use
What Is a Resume Header?
A resume header is the section at the beginning of your resume that contains your name, contact details, and relevant links.
It tells hiring managers who you are and how to reach you. It also ensures Applicant Tracking Systems (ATS) can correctly identify your information when scanning your resume.
What to Include in a Resume Header
Your resume header should include your full name, phone number, professional email address, location (city and state), and LinkedIn profile. And add a portfolio or website if it’s relevant to the role.
There’s no need to overcomplicate it.
1. Full name
Your name sits at the very top of your resume in a larger, bold font (20–24 pt) so it stands out immediately.
It should match your LinkedIn and portfolio exactly. If you use a middle initial professionally (e.g., Maggie N. Smith), include it. If you have a double-barreled surname, use the full version.
2. Phone number
Add one phone number, preferably the one you actually answer.
Make sure it accepts voicemail and that your outgoing message sounds professional (not something you recorded in high school for laughs).
- For US jobs, use this format: (123) 456-7890
- For international roles: +1 (123) 456-7890
3. Professional email address
Use a simple email you check regularly, like firstname.lastname@gmail.com.
Avoid nicknames, random numbers, or joke handles; what seems funny to you mightn’t land the same way with a hiring manager. Stick with modern providers like Gmail or Outlook, and don’t put down a work or school email.
4. Location
List your city and state, e.g., San Francisco, California. If you’re applying internationally, go for city and country instead: San Francisco, United States.
Don’t put your full street address.
If you’re applying from a different location, mention in your resume summary that you’re “relocating to San Francisco, CA” or “open to relocation.”
5. LinkedIn and relevant links
Include your LinkedIn profile, ideally as a clickable link with a customized URL that uses your name instead of random characters. Before adding it, make sure your profile is up to date.
Add a portfolio, personal website, or relevant social media only if it strengthens your application. To save space, use a shortened URL, e.g., wordpress.com/justin-gomez.
For help with your LinkedIn, check out How to Make a Good LinkedIn Profile.
Resume Header Examples
If you’re not sure what your header should look like, here are a few examples, including options from our ATS-friendly templates and a Word template.
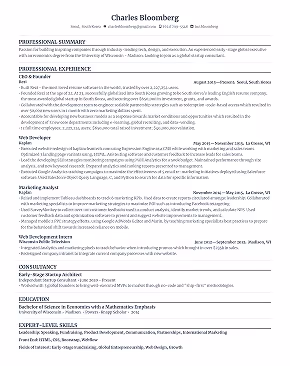
Professional resume header example

This header from our standard resume template is simple and clear. The layout keeps everything easy to read, and the optional icons add a subtle visual touch without overwhelming the design.
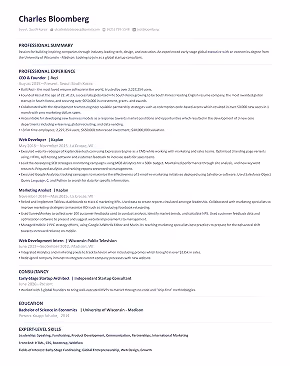
Modern resume header example

Our modern resume template uses a bold name (you can customize the color) to create contrast while keeping the rest of the details clean and minimal.
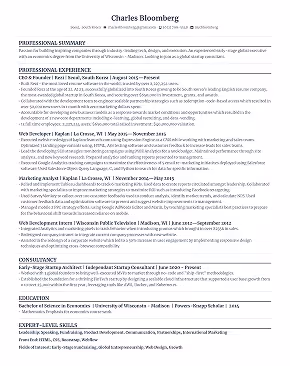
Tech resume header example

This version from our creative resume template is structured and balanced, with a divider line separating the name from the contact details.
Student resume header example

The Harvard resume template keeps things classic and center-aligned.
Creative resume header example

This example from a popular Word resume template uses a pop of color in the name and divider, adding just enough personality without overdoing it.
Resume header template
If you don’t want to deal with formatting, here’s a simple header you can copy and paste:

What NOT to Include in a Resume Header
It’s a simple section, but people still manage to get it wrong.
Here’s what to leave out of your resume header:
- Full address. You don’t need your full street address. They’re not sending you a letter or coming over for dinner. City and state/country are enough.
- Date of birth. Employers don’t need to know your age. If you’re qualified, that’s what matters.
- Photo. Unless you’re in a field that specifically requires one, leave it out. It’s not standard in the US and most of Europe, and it can work against you.
- Multiple phone numbers. One number is plenty.
- Irrelevant or unprofessional links. If it strengthens your application, include it. If it doesn’t, leave it out. Your TikTok dance account probably isn’t helping your software engineering application.
Read more about Personal Details in a Resume.
Resume Header Format: Best Practices
In short: format your header clearly: one line or stacked, left-aligned or centered, on the first page only, with your name larger (20–24pt), other details smaller (9–12pt), and single or 1.15 spacing.
A friend once sent me their resume for review, and I had to actively search for their contact details — they were buried in a single line at the bottom of the page. Don’t do that.
How you format your resume header matters, and it should be easy to spot and scan.
One line or stacked?
Both work. But if you’re tight on space, keep everything on one line.
Left-aligned or centered?
Either is fine. It’s mostly personal preference; both can look polished when done well.
Header on a two-page resume?
You only need it on the first page. This mattered more when resumes were printed and handed out.
Font size?
Your name should stand out at 20–24 pt. Contact details, location, and links can sit between 9–12 pt.
Spacing?
Keep your resume at single or 1.15 line spacing for a clean, readable layout.
Check out the Best Resume Format.
How to Create a Resume Header in Word
In Word, insert a table with one row and as many columns as you need (five if you’re including a website). You might need to reduce the font to 9 pt for everything to fit on one line.
Once your details are filled in, remove the table borders so it looks clean.
Important: don’t put your contact details in the Word header or footer. ATS only read content in the body of your resume, so if your info is in the header or footer, it might get missed entirely.

Browse the Best MS Word Resume Templates.
What Is a Headline for a Resume?
A resume headline is different from your header. It’s a single line placed just under your name, before your summary, where you highlight your professional title, key skills, and years of experience. It’s a mini resume summary in one sentence.
Examples of good resume headlines:
- Marketing Specialist | Branding & Digital Strategy | 10+ Years Driving SMB Growth & ROI
- Event Coordinator Planning Memorable Corporate Conferences and Product Launches
- Customer Success Manager | SaaS Onboarding & Retention | 6 Years Improving Customer Lifetime Value
- Junior Web Developer Building Responsive, High-Performance Apps With React & Node.js
- UX/UI Designer | Mobile & Web | Creating Interfaces That Boost Engagement
- Sales Executive | B2B & SaaS | Exceeding Quarterly Targets by 20%+
- Digital Marketing Manager | Paid Media & SEO | Driving 150% Lead Growth
- Social Media Manager Growing Instagram and LinkedIn Followers by 300% in 12 Months
- Graphic Designer Bringing Brands to Life With Award-Winning Visual Campaigns
Headlines are optional, and if you already have a strong summary, you don’t really need one. If you like the idea but want to save space, your first sentence of the summary can double as your headline.
What Are Resume Headings?
Resume headings are the titles for the different sections of your resume, such as Summary, Experience, Education, and Skills.
Optional sections can include Awards & Honors, Projects, Certifications, Coursework, and Publications.
Helpful guides for each section:
- How to Write a Resume Work Experience Section
- Tips for Listing Education on a Resume
- Skills Section of a Resume
- How to Put Projects on a Resume
- How to Add Certifications to a Resume
- Relevant Coursework for Your Resume
Summary
Here’s a quick recap of your resume header:
- Place your header at the top of your resume, and include your full name, phone number, professional email, city and state (or country), and LinkedIn or relevant portfolio link.
- Emphasize your name in 20–24 pt, with the rest of your contact info in 9–12 pt, and use single or 1.15 spacing.
- Keep the layout clear and scannable: one line or stacked, left-aligned or centered, and include the header only on the first page of a two-page resume.
- Avoid adding unnecessary information like your full street address, date of birth, photo, multiple phone numbers, or unprofessional links.
- A headline is optional: a single line under your name can summarize your title, key skills, and years of experience, or your summary’s first sentence can serve this purpose.
- Headings organize your resume, with common sections including Summary, Experience, Education, and Skills, and optional sections like Awards, Projects, Certifications, Coursework, or Publications.
- Ensure all links are up to date and professional, with customized LinkedIn URLs and portfolios or websites that strengthen your application.
- Your name and contact info should match your LinkedIn, portfolio, and other professional profiles for consistency.
FAQ
Should a cover letter have the same header as a resume?
You can use the same header on your cover letter as your resume to keep your application consistent, but the formatting usually differs. Cover letters typically list contact details in a stacked format, left- or right-aligned, instead of on one line like a resume. For example:
Jenna Astrom
(555) 555-1234
Should I include my job title in my resume header?
Including your job title in your header is optional. It can help ATS recognize your role, but it’s usually enough to include it in your resume summary. This way, the header stays clean while your title still gets noticed.
Should I include a resume footer?
A footer isn’t really necessary on a resume. Some people use it to repeat their name or add page numbers on multi-page resumes, but it’s up to you. Just make sure you don’t put any critical information in the footer, because ATS often can’t read it.
How do I title a resume file?
Save your resume with a simple, professional file name, like “Firstname-Lastname-Resume.” You can also add the job title or company, e.g., “Ann Smith Project Manager Resume.” Just avoid generic names like “Resume (5).”
How to create a strong resume?
A strong resume is tailored to the job you’re applying for. Focus on relevant experience, measurable accomplishments, and keywords from the job description. Organize it with standard sections, keep it concise at one or two pages, use an ATS-optimized resume template, and showcase the specific skills and tools you actually use.

Sarah Coghlan is a writer and editor passionate about making resume and career advice clear and accessible to all. Based in Barcelona, her goal is to help job seekers create standout resumes and navigate the job search process with confidence and ease.